
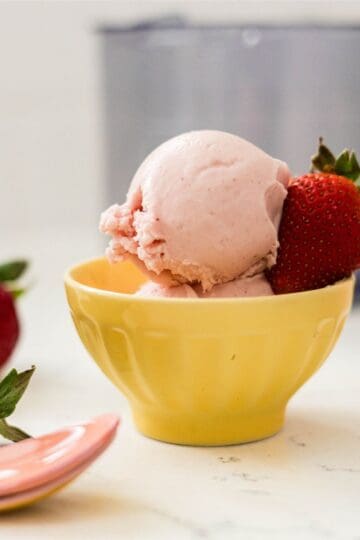
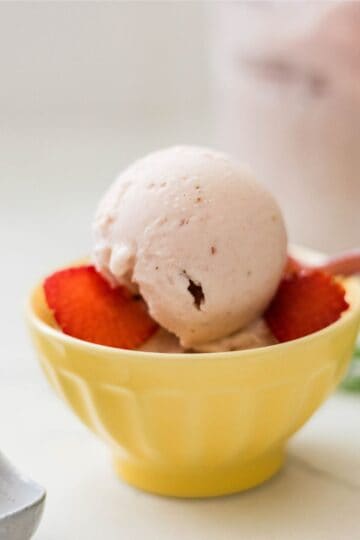
This Ninja Creami Strawberry Cheesecake Ice Cream is rich, creamy, and bursting with fresh strawberry flavor! If you love cheesecake and ice cream, this recipe is the perfect combination of both.
I’ve been making this ice cream for a while now, and it never disappoints. It’s creamy, tangy, and has that classic cheesecake flavor that rivals the DQ Strawberry Cheesecake Blizzard, but made with real ingredients you can actually feel good about.
The best part? It's homemade, so no unnecessary gums or additives. Just simple ingredients that make a smooth and delicious frozen treat.
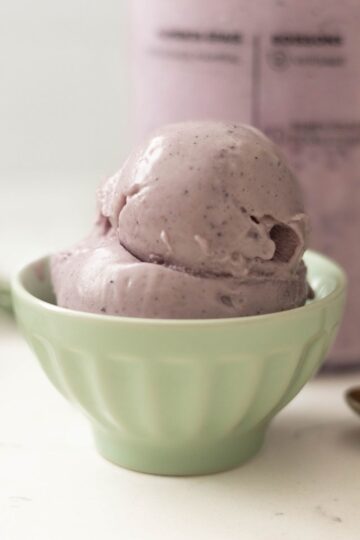
If you love cheesecake flavors, you should also check out my Blueberry Cheesecake Ice Cream for another fruity twist, my Blackberry Cheesecake Ice Cream for a deeper berry flavor, or my Keto Vanilla Ice Cream if you're looking for a low-carb alternative!

Jump to:
- Why You'll Love This Recipe
- The Macerating Technique (Big Strawberry Flavor)
- 🛒Ingredients You’ll Need
- Step-by-Step Instructions
- 🍒Fun Mix-Ins and Toppings
- 👪Servings Per Batch
- 🌀Tools You’ll Need
- Helpful Tips for Success
- Recipe FAQs
- More Cheesecake-based Ice Cream
- Did you try this recipe?
- Ninja Creami Strawberry Cheesecake Ice Cream
Why You'll Love This Recipe
- No pudding mix or gums – Just real, fresh ingredients
- Tastes like real cheesecake – A perfect balance of sweet and tangy
- Fresh strawberry flavor – No artificial flavors, just real fruit
- Perfectly creamy – The Ninja Creami gives it an amazing texture
- Great for meal prep – Make it ahead and enjoy anytime
- Cheaper than DQ – Premium Blizzard flavor at a fraction of the cost
- Beautiful pink color – Naturally gorgeous from real strawberries
The Macerating Technique (Big Strawberry Flavor)
Macerating is a simple trick that boosts strawberry flavor fast. Toss sliced strawberries with sugar and let them sit. The sugar pulls out the juices, creating a syrup that makes your base taste more strawberry, look pinker, and blend smoother.
To do it, hull and quarter the strawberries, toss with the 2 tablespoons sugar from the recipe, and let sit 10 to 15 minutes (up to 30 for more juice). Use the berries and all the syrup. It’s ready when they look glossy and there’s pink juice in the bowl.
🛒Ingredients You’ll Need
This is just an overview—jump down to the full recipe card below for exact amounts and detailed instructions!

- Half and half – For a creamy base.
- Fresh strawberries – Fresh or frozen, for a natural fruity taste.
- Sweetened condensed milk – Adds richness and sweetness.
- Cream cheese – The key ingredient for that cheesecake flavor.
- Vanilla bean extract – Enhances the overall taste.
- Granulated sugar – Balances the tanginess.
See recipe card for quantities.
Substitution and Additions
- Replace half and half → Use equal parts heavy cream and whole milk.
- Swap condensed milk → Use honey or maple syrup for natural sweetness.
- No cream cheese? → Try ricotta for a slightly different flavor.
- Add-ins → Mix in white chocolate chips or crushed graham crackers.
Step-by-Step Instructions

- Macerate the strawberries – Toss them with sugar and let them sit for 10 minutes.

- Blend ingredients – Combine everything in a blender until smooth.

- Freeze in a Ninja Creami pint – Cover with plastic wrap and freeze for 24 hours.

- Spin on the right mode – Use the “Ice Cream” setting on your Ninja Creami. If it’s crumbly, add 1-2 tablespoons of milk and respin.

- Serve and enjoy – Top with graham cracker crust, strawberry sauce, or fresh berries.
🍒Fun Mix-Ins and Toppings
Classic Cheesecake Toppings
- Graham cracker crumbs – Adds that authentic cheesecake crust crunch
- Fresh strawberry chunks – Extra juicy bursts in every bite
- Honey drizzle – Natural sweetness that pairs perfectly with cream cheese
- Lemon zest – Brightens the tangy cheesecake flavor
- White chocolate chips – Creamy sweetness that complements the berries
- Dark chocolate shavings – For chocolate-covered strawberry vibes
Fruity Extras
- Fresh blueberries – Mixed berry cheesecake!
- Strawberry sauce swirl – Double the strawberry flavor
- Lemon curd swirl – Tangy, bright, and gorgeous
Crunchy Mix-Ins
- Crushed pistachios – Nutty crunch with beautiful color contrast
- Sliced almonds – Classic nutty pairing
- Crushed Oreos – Cookies and cream meets cheesecake
👪Servings Per Batch
This recipe is made for the Ninja Creami Deluxe and serves 4 people.
If you're using a standard 16-ounce Ninja Creami pint, use two-thirds of each ingredient.
🌀Tools You’ll Need
- Blender: Makes mixing ingredients effortless.
- Ninja CREAMi Deluxe 11-in-1 Ice Cream & Frozen Treat Maker: The star of the show, perfect for creating creamy, smooth ice cream.
- Ninja Creami Pint Container: The pint container is essential for freezing and churning your ice cream mix.
Helpful Tips for Success
- If too crumbly, add 1-2 tablespoons of milk and respin.
- Flatten leftovers before freezing to prevent damage to the blade.
- Taste the ice cream base before freezing – it should be slightly sweeter than you prefer since freezing dulls the flavor.
- Flatten the surface before refreezing so the Ninja Creami blade doesn’t get damaged.
- To enjoy later: Let thaw for a few minutes or microwave (on ice cream setting).
- Re-spin if needed for a fresh, creamy texture.
- If you used mix-ins, note that nuts, cookies, or chocolate chips will get pulverized.
Recipe FAQs
It’s rich, creamy, and perfectly balanced between tangy cream cheese and sweet strawberries, with a smooth, velvety texture.
Absolutely! Thaw them completely and pat dry with paper towels first. This removes excess moisture that could make your ice cream icy. Frozen berries often have more consistent flavor than out-of-season fresh ones.
You don't have to, but I highly recommend it. Macerating releases the berry juices, intensifies flavor, and gives you that gorgeous pink color. It only takes 10 minutes and makes a real difference.
Nothing wrong! This is completely normal with fruit-based recipes. Just add 1-2 tablespoons of milk and use the Respin function. Usually one respin fixes it perfectly.
Most likely it was too cold. Cream cheese needs to be at room temperature to blend properly. Set it out 30 minutes before making the recipe, or microwave it for 15 seconds.

More Cheesecake-based Ice Cream
Looking for other recipes like this? Try these:


Did you try this recipe?
Share how it turned out in the comments below, and if you loved it, share it on Facebook, Pinterest & Instagram.
Thank you! - Rose

Ninja Creami Strawberry Cheesecake Ice Cream
Equipment
- Ninja Creami Deluxe
- Blender
- Ninja Creami Pint Container
Ingredients
- 1.5 cups half and half
- 1 cup strawberries
- ¼ cup sweetened condensed milk add more if you wanted it sweeter
- ½ cup cream cheese
- 1 teaspoon vanilla extract
- 2 tablespoons sugar
Instructions
- Macerate the strawberries – Toss them with sugar and let them sit for 10 minutes.1 cup strawberries, 2 tablespoons sugar
- Blend ingredients – Combine everything in a blender until smooth.1.5 cups half and half, ¼ cup sweetened condensed milk, ½ cup cream cheese, 1 teaspoon vanilla extract
- Freeze in a Ninja Creami pint – Cover with plastic wrap and freeze for 24 hours.
- Spin on the right mode – Use the “Ice Cream” setting on your Ninja Creami.
- Re-spin if needed – If it’s crumbly, add 1-2 tablespoons of milk and respin.
- Serve and enjoy – Top with graham cracker crust, strawberry sauce, or fresh berries.
Notes
- If too crumbly, add 1-2 tablespoons of milk and respin.
- Flatten leftovers before freezing to prevent damage to the blade.
- Taste the ice cream base before freezing – it should be slightly sweeter than you prefer since freezing dulls the flavor.
- Flatten the surface before refreezing so the Ninja Creami blade doesn’t get damaged.
- To enjoy later: Let thaw for a few minutes or microwave (on ice cream setting).
- Re-spin if needed for a fresh, creamy texture.
- If you used mix-ins, note that nuts, cookies, or chocolate chips will get pulverized.
Rose Sioson says
I'm so glad to share this Strawberry Cheesecake Ice Cream with you all! It’s rich, creamy, and packed with the perfect balance of sweet strawberries and tangy cheesecake flavors. I hope you enjoy it just as much—let me know if you give it a try!