

I brought home a bottle of real maple syrup from a trip to Canada, and there was no way it was staying "just for pancakes." It went into my coffee, my salad dressings, a batch of candied nuts, and, of course, a Creami pint.
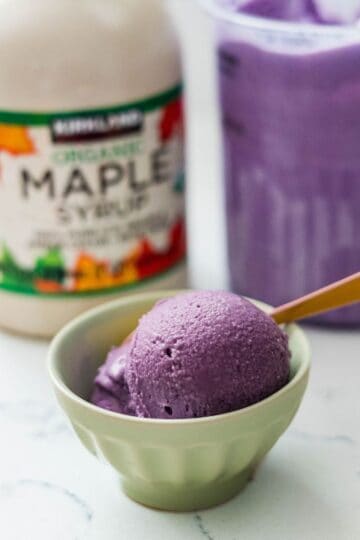
This Ninja Creami Maple Walnut Ice Cream is what came out of it: pure maple syrup blended with half and half, cream cheese, and a little condensed milk, with candied maple walnuts mixed in after spinning. There are no eggs, no gums, and no pudding mix. If you like maple flavors, try my Maple Ube Latte Ice Cream next.
New to the machine? My Ninja Creami Beginner's Guide walks you through freezing, spinning, and respins, so your first pint comes out smooth instead of crumbly.

Jump to:
- Why You'll Love This Maple Walnut Ice Cream
- Ingredients You'll Need
- How to Make Maple Walnut Ice Cream
- 🍒Topping & Serving Ideas
- 👪Serving Size
- 🌀Tools You’ll Need
- Recipe Tips & Troubleshooting
- Recipe FAQs
- Fall Flavors
- Cheesecake Style Ninja Creami Ice Cream Recipes
- Did you try this recipe?
- Ninja Creami Maple Walnut Ice Cream
Why You'll Love This Maple Walnut Ice Cream
- No heavy cream. Half and half keeps the base creamy without turning buttery or waxy on a respin.
- No eggs, gums, pudding mix, or protein powder. Cream cheese and condensed milk give it body, so there's no custard to cook and nothing artificial to thicken it.
- Real maple flavor. Pure maple syrup tastes like maple, not the artificial maple flavoring in many store-bought pints.
- Crunchy walnuts in every bite. The candied walnuts go in after spinning, so they stay crisp instead of breaking down into the base.
- A fall flavor the whole family likes. Mild, nutty, and sweet without being too rich.
Ingredients You'll Need
This is just an overview. Jump down to the full recipe card for exact amounts and instructions.

- Half and half: The creamy base. It has enough fat for a smooth scoop but won't churn into butter in the Creami the way heavy cream can.
- Sweetened condensed milk: Adds sweetness and, because it's so high in sugar, keeps the pint scoopable instead of icy.
- Cream cheese: Gives the base body and richness without needing egg yolks. Use full-fat and soften it so it blends without lumps.
- Pure maple syrup: The main flavor. Use real maple syrup, not pancake syrup, which is mostly corn syrup with maple flavoring.
- Vanilla bean paste or extract: Rounds out the maple. Paste adds little vanilla specks if you want them.
- Candied maple walnuts: Added after spinning for crunch. I use my 3-ingredient candied maple walnuts, but toasted walnuts work too.
- Salt: A pinch keeps the maple from tasting flat and balances the sweetness.
Substitutions
- Candied walnuts: Toasted walnuts work if you don't have candied ones. Toasting brings out their oils, so they stay nutty instead of tasting flat once frozen.
- Walnuts: Pecans work the same way, with a slightly sweeter, more buttery flavor.
- Maple syrup: Use ½ teaspoon maple extract plus a little extra sweetened condensed milk. Extract gives the flavor but no sweetness or body, so the condensed milk makes up for it.
- Half and half: Mix equal parts heavy cream and whole milk if you don't have it. Together they come close to half and half's fat level, so the texture stays the same.
- More fall spice: Add ¼ teaspoon cinnamon or nutmeg to the base before freezing. Spices dull in the cold, so add them to the base, not on top.
How to Make Maple Walnut Ice Cream

- Blend the base. Add the half and half, condensed milk, softened cream cheese, maple syrup, vanilla, and salt to a blender. Blend until completely smooth, since any cream cheese lumps freeze into hard bits. Pour the base into a Ninja Creami Deluxe 24-ounce pint.

- Freeze for 24 hours. Cover and freeze on a flat surface for a full 24 hours, so the pint freezes solid all the way through and spins creamy instead of slushy.

- Spin. Lock the pint into the machine and press Ice Cream. If it comes out crumbly, add 1 to 2 tablespoons of half and half to a small well in the center and press Respin. It should turn smooth and creamy.

- Add the walnuts. Make a well in the center, add the chopped candied maple walnuts, and run the Mix-In program. Adding them after spinning keeps them crunchy.

- Serve. Scoop right away, or freeze for 10 to 15 minutes if you like it firmer.
🍒Topping & Serving Ideas
- Extra maple syrup: A drizzle on top brings the maple flavor right up front, since some of it fades once frozen.
- More candied or toasted walnuts: Sprinkle them on top for crunch you can see, on top of the walnuts already mixed in.
- Flaky sea salt: A few flakes after spinning turn it into salted maple. The salt stays crisp on top instead of dissolving into the base.
- Cinnamon: A light dusting adds warmth and smells like fall as soon as you scoop.
- Whipped cream: Lightens each scoop and works as a sundae topping with the maple drizzle.
- Ice cream sandwiches: Scoop between two oatmeal cookies. The oats and brown butter pair well with maple.
👪Serving Size
This recipe is made for the Ninja CREAMi Deluxe and its 24-ounce pint, so it makes about 4 servings at roughly 340 calories each.
Using the original 16-ounce pint? Fill only to the max fill line and save any extra base for another pint, so the blade can reach the bottom.
🌀Tools You’ll Need
- Blender: Blends the cream cheese and maple syrup completely smooth, so no lumps freeze into hard bits in the pint.
- Ninja CREAMi Deluxe 11-in-1 Ice Cream & Frozen Treat Maker: The machine I tested this in. The Deluxe uses a 24-ounce pint and has the Ice Cream, Respin, and Mix-In programs used in the steps.
- Extra Ninja Creami pints: Each base needs 24 hours in the freezer, so a spare pint lets you start the next batch while you finish this one.
Recipe Tips & Troubleshooting
- Crumbly after the first spin? That's normal for a fully frozen pint. Add 1 to 2 tablespoons of half and half to a small well in the center and press Respin, once or twice.
- Too soft? Return the pint to the freezer for 10 to 15 minutes before scooping.
- Grainy texture? The cream cheese probably wasn't fully blended. Soften it before blending and blend until the base is completely smooth.
- Walnuts went soft? They were added too early. Add nuts only with the Mix-In program, after spinning, never before freezing.
- Storing leftovers: Level the top, cover, and freeze for up to 2 weeks. Respin before serving to bring back the creamy texture.
Still not sure why your texture looks off? Check my Ninja Creami FAQ and Troubleshooting Guide.
Recipe FAQs
Not on its own. Straight heavy cream can turn buttery and waxy when the Creami spins it. If you're out of half and half, mix equal parts heavy cream and whole milk instead. That comes close to half and half's fat level.
Add them after spinning, using the Mix-In program, and never before freezing. Walnuts frozen into the base soften and lose their crunch.
Yes. Use ½ teaspoon maple extract plus a little extra sweetened condensed milk to make up for the sweetness and body the syrup would add.
I wouldn't. Most pancake syrup is corn syrup with maple flavoring, so the pint tastes artificial. Use pure maple syrup.
Yes. Divide the base between two Deluxe pints and freeze both.
Yes. Fill the 16-ounce pint only to the max fill line and save any extra base for another pint.




Cheesecake Style Ninja Creami Ice Cream Recipes



Did you try this recipe?
Share how it turned out in the comments below, and if you loved it, share it on Facebook, Pinterest & Instagram.
Thank you! - Rose

Ninja Creami Maple Walnut Ice Cream
Equipment
- 1 Ninja Creami Deluxe 11 in 1 Ice Cream Maker
- 1 Ninja Creami 24 ounce container pint
- 1 Blender
Ingredients
- 1 cup half and half
- ¼ cup sweetened condensed milk
- 2 ounces full-fat cream cheese
- 3 tablespoons pure maple syrup
- 1 teaspoon vanilla bean paste or extract
- ½ cup chopped candied maple walnuts
- Pinch of salt
Instructions
- Soften the cream cheese. Add the half and half, condensed milk, cream cheese, maple syrup, vanilla, and salt to a blender and blend until completely smooth.1 cup half and half, ¼ cup sweetened condensed milk, 2 ounces full-fat cream cheese, 3 tablespoons pure maple syrup, 1 teaspoon vanilla bean paste or extract, Pinch of salt
- Pour the base into a Ninja Creami Deluxe pint. Cover and freeze on a flat surface for 24 hours.
- Remove the lid, place the pint in the outer bowl, attach the paddle lid, and lock it into the machine. Press Ice Cream.
- If it's crumbly, add 1 to 2 tablespoons of half and half to a small well in the center and press Respin.
- Make a well in the center, add the chopped candied walnuts, and run the Mix-In program.½ cup chopped candied maple walnuts
- Serve right away, or freeze for 10 to 15 minutes for a firmer texture.
Notes
- Use half and half, not heavy cream. Straight heavy cream can turn buttery when the Creami spins it.
- Soften the cream cheese and blend until completely smooth. Lumps freeze into hard bits.
- Use pure maple syrup, not pancake syrup, which is mostly corn syrup with maple flavoring.
- Add the walnuts after spinning, with the Mix-In program, so they stay crunchy.
- No candied walnuts? Toasted walnuts or pecans work too.
- Original Creami (16-ounce pint): Fill only to the max fill line and save any extra base.
- Leftovers: Level the top, cover, and freeze for up to 2 weeks. Respin before serving.
- Nutrition is an estimate and varies with how heavily your walnuts are candied.


Rose says
Crunchy walnuts in that rich maple ice cream… this one tastes like a cozy fall dessert in a pint. So simple but so good — hope you guys give it a try!